

Quick start
Get Aisman running with your AI coding agent in five minutes.
Before you start
Section titled “Before you start”You need:
- An Aisman account (sign up at aisman.com)
- An AI coding agent installed (GitHub Copilot, Cursor, Claude Code, Windsurf, RooCode, or similar)
- A project folder on your local machine
Step 1: Create a project
Section titled “Step 1: Create a project”- Open the Dashboard and sign in.
- Type a project name in the filter box and press Enter.
- Choose a short acronym (e.g.
AIM) — this prefixes all issue numbers. - Go to the Details tab and click Browse to set your project’s root folder.
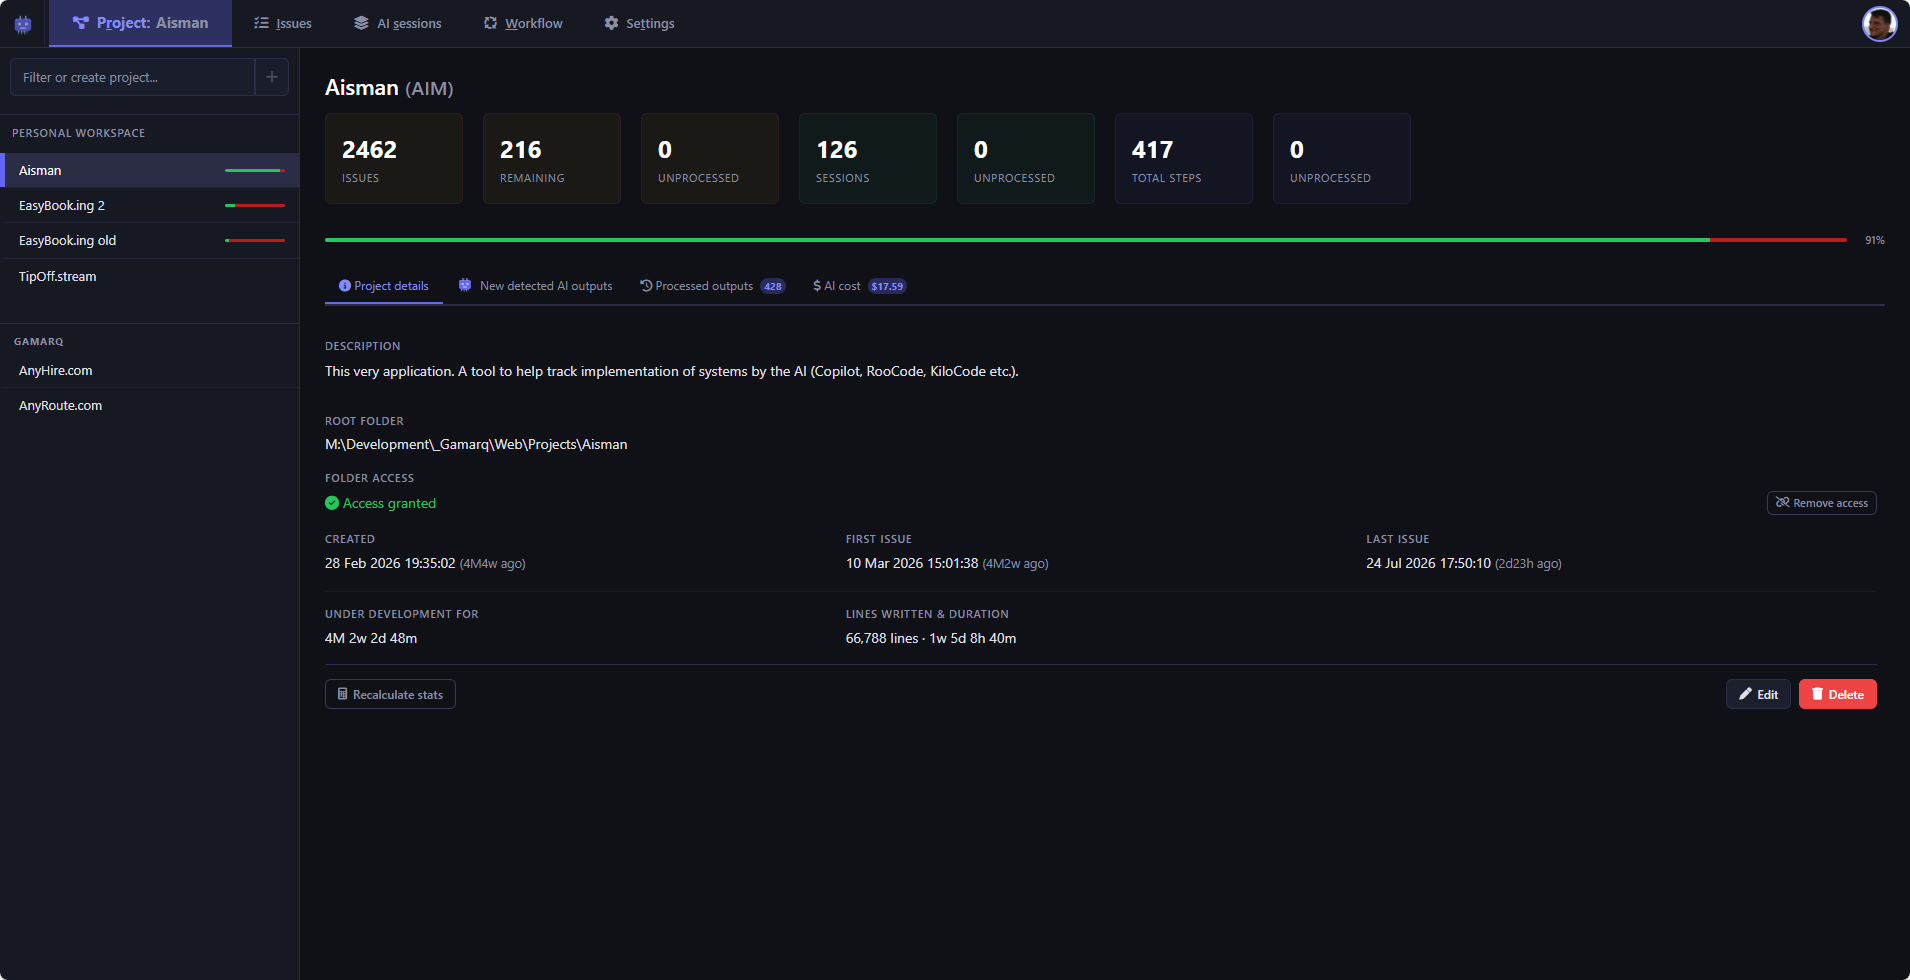
① Project list on the left — filter, click, or right-click for context menu ② Details tab on the right — project name, acronym, root folder, and machine
Aisman creates a .aisman folder in your project root. This is where instructions and output files are exchanged with your AI agent. Everything stays on your machine.
Step 2: Configure your AI agent
Section titled “Step 2: Configure your AI agent”Your AI agent needs to know about Aisman’s input/output format. This is a one-time setup.
- Go to Dashboard → Settings → Host instructions.
- Select your AI tool from the dropdown (e.g. GitHub Copilot, Cursor).
- Grant file access when prompted — Aisman needs to read/write the instruction file.
- Click Create file if no instruction file exists yet.
- Click Insert Aisman instructions to add the required header.
- Click Add basic coding principles to insert recommended guidelines.
- Click Save.
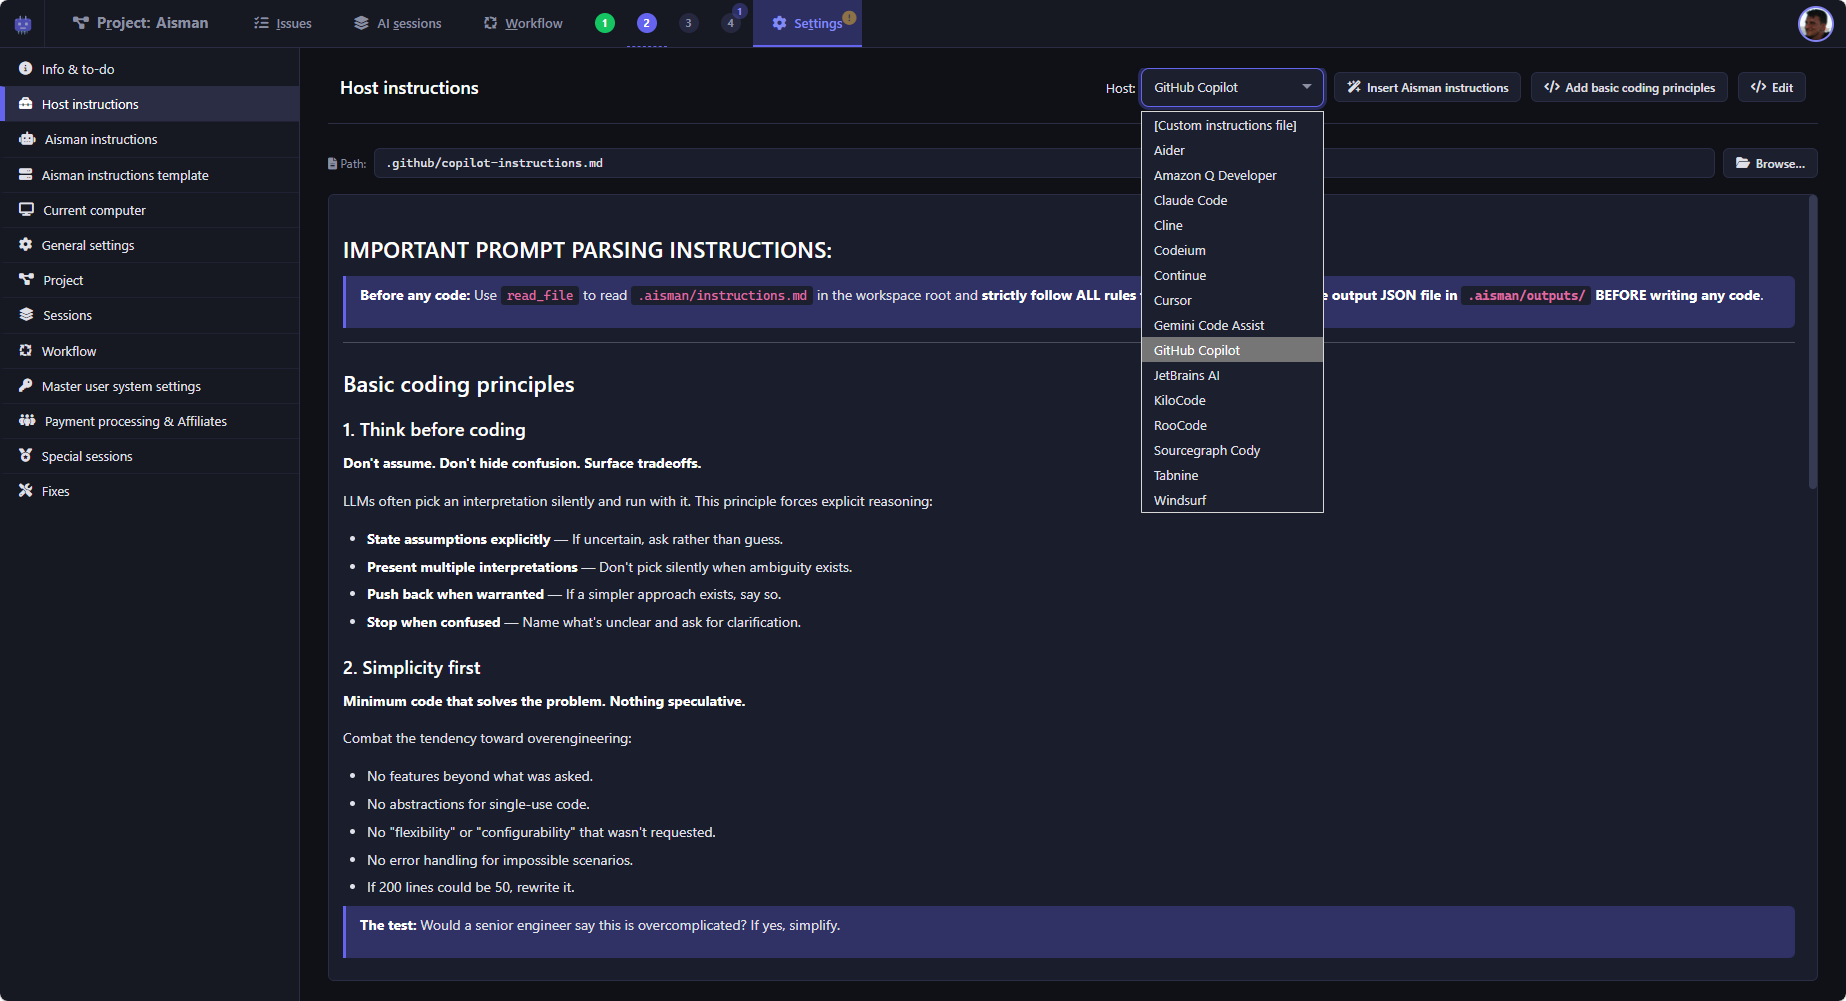
① Host dropdown — select your AI coding agent from the list ② Instruction file path — the file Aisman will read and write ③ Insert Aisman instructions — one-click insertion of the required Aisman directive
The instruction file points to .aisman/instructions.md — when Aisman updates instructions, your agent automatically picks up the changes.
Supported hosts
Section titled “Supported hosts”| Host | Instruction file path |
|---|---|
| GitHub Copilot | .github/copilot-instructions.md |
| Cursor | .cursor/rules |
| Claude Code | CLAUDE.md |
| Windsurf | .windsurfrules |
| RooCode | .roo/rules |
| KiloCode | .kilocode/rules |
| Continue | .continue/config.json |
| Aider | .aider/conventions.md |
| Codeium | .codeium/instructions.md |
| Custom | User-defined path |
Step 3: Run your first workflow
Section titled “Step 3: Run your first workflow”Every AI coding session follows four steps:
Step 1: Select issues
Section titled “Step 1: Select issues”In the Workflow tab, check the issues to include. You can also type new free-form instructions — Aisman decomposes them into discrete issues automatically.
Step 2: Add instructions
Section titled “Step 2: Add instructions”Add any extra context, constraints, or design preferences. This text is included verbatim in the prompt.
Step 3: Generate prompt
Section titled “Step 3: Generate prompt”Click Generate. Aisman compiles all selected issues — with their history, relationships, and notes — into a structured prompt saved in .aisman/inputs/. It’s copied to your clipboard automatically.
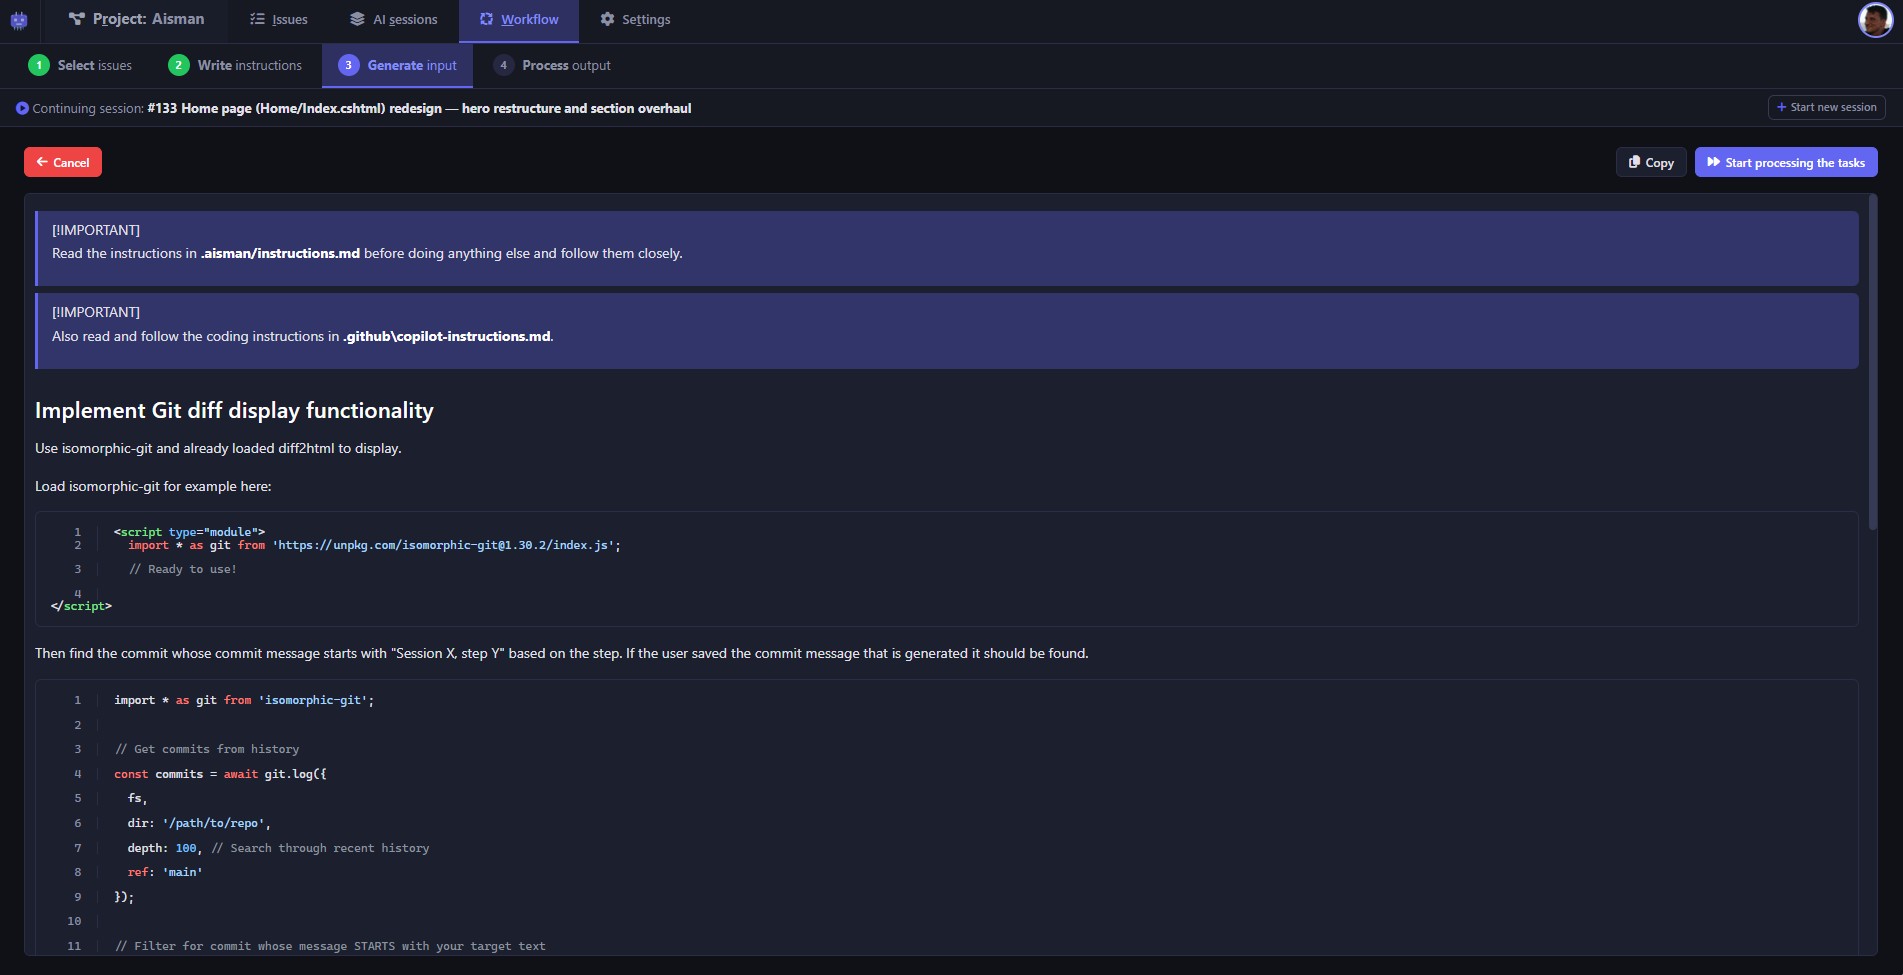
① Selected issues — the issues you checked in Step 1 ② Generate button — creates the input file and copies it to clipboard
Paste it into your AI agent and let it work.
Step 4: Process output
Section titled “Step 4: Process output”When your agent completes the task, it drops a JSON result file into .aisman/outputs/. Aisman detects it automatically, parses it, updates issue statuses, and records the session history.
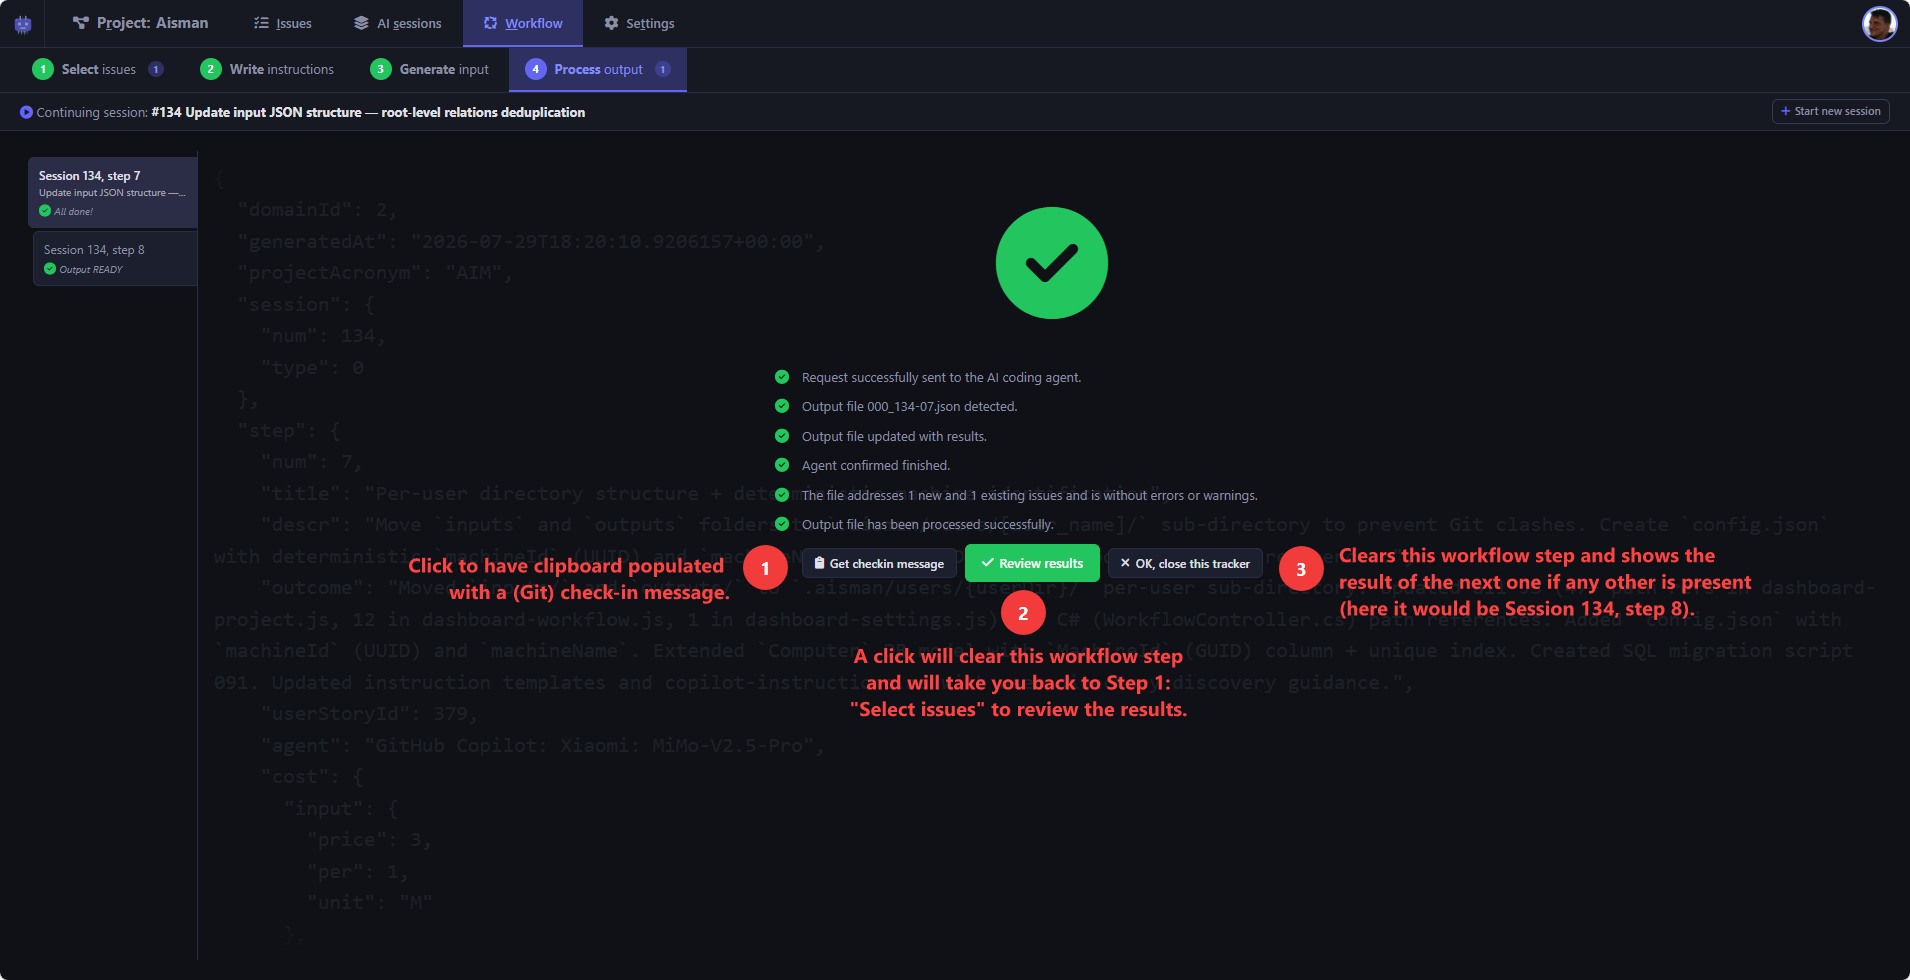
① Output file — the JSON result written by your AI agent ② Review button — click to go back to Step 1 and see the updated issue statuses
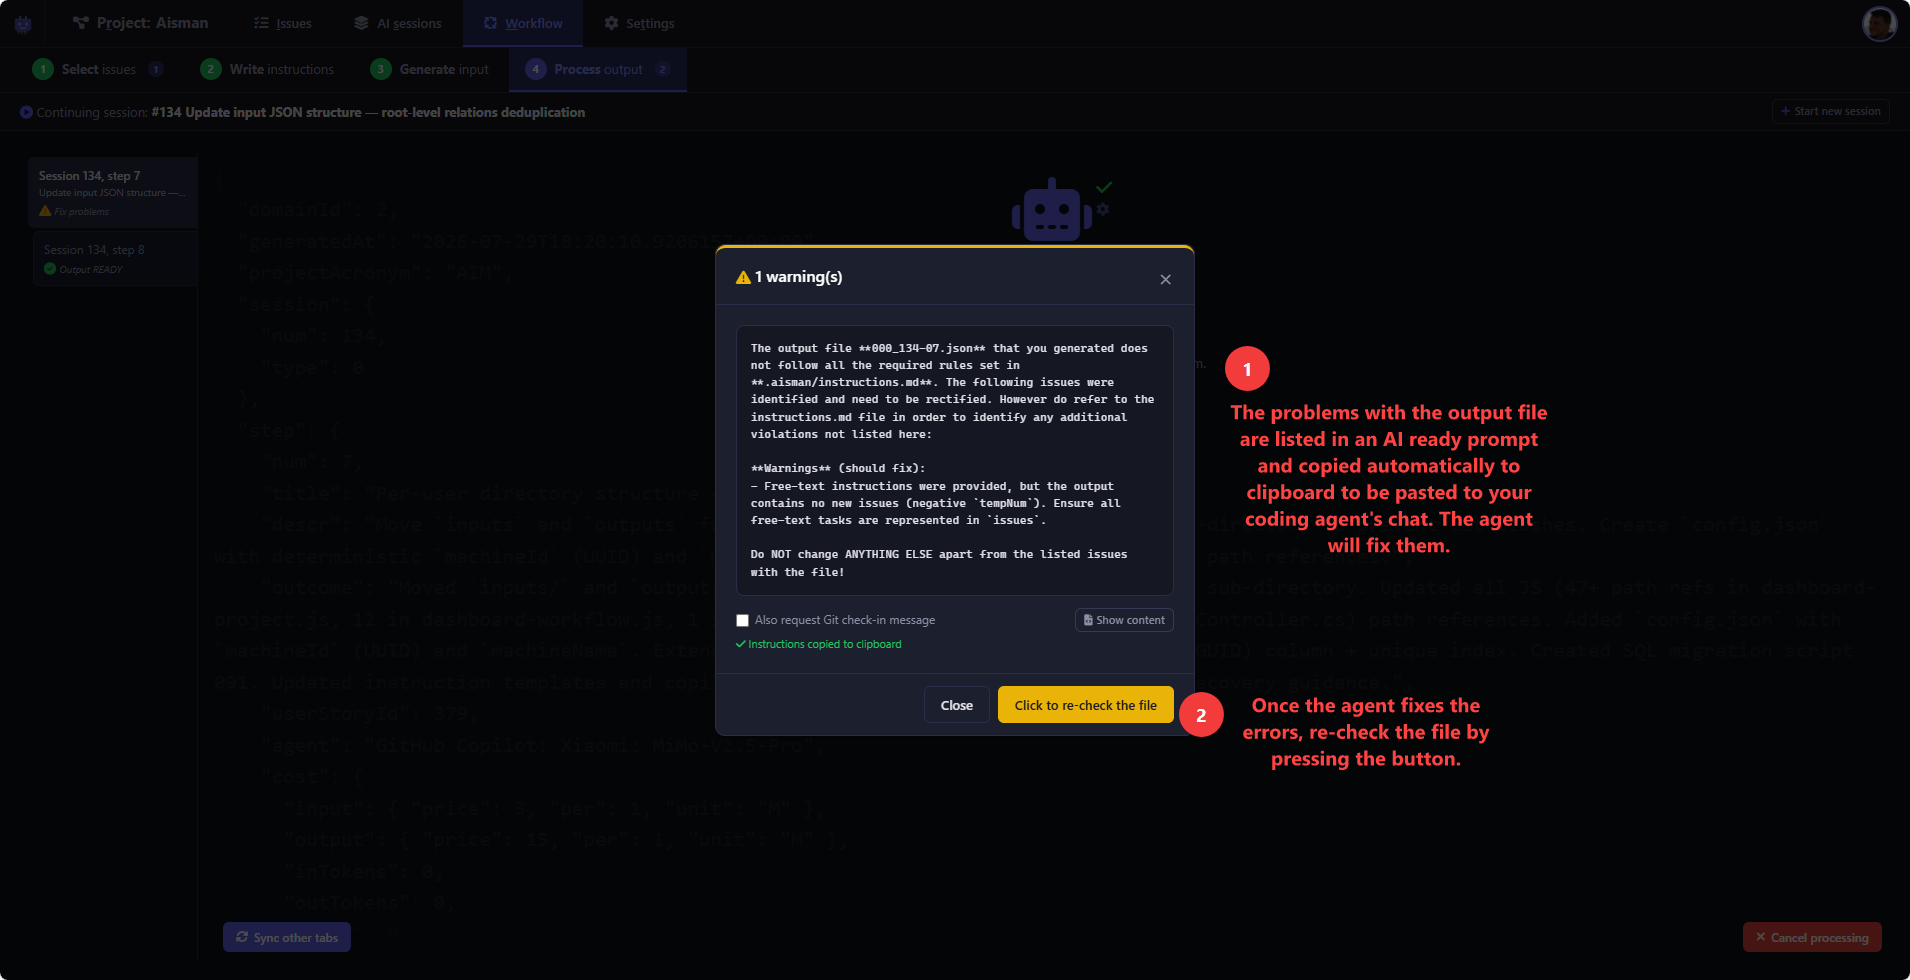
If the output has errors, Aisman shows a detailed error list and provides a targeted fix prompt you can send back to the agent.
What you get after each session
Section titled “What you get after each session”- Issue statuses update automatically (not started → in progress → implemented → confirmed)
- Session history records what the agent did, lines changed, and issues touched
- New issues appear if the agent discovered bugs or created sub-tasks
- Relationships between issues are tracked (dependencies, parent-child, extensions)
Review everything from the Dashboard, Issues tab, or Sessions & Steps tab.
Next steps
Section titled “Next steps”- Workflow guide — Deep dive into the 4-step workflow
- Sessions — Understanding session tracking
- Session types — Different session types and their uses
- Video tutorials — See Aisman in action
- Set up instruction files
- Review pricing and subscriptions